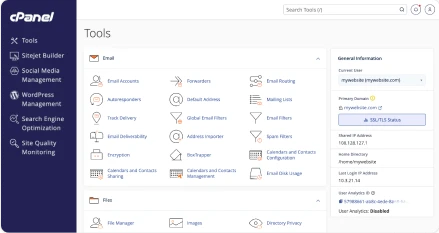
cPanel & WHM is a tool that has become synonymous with web hosting. However, while hosting providers around the world use this software to offer their customers the freedom to manage their websites, email accounts, databases, and more, they have also been given very few options when it came to customizing, personalizing, and branding the dashboard they offer their clients. This has changed in our recent updates to cPanel & WHM. Now, with additions like Paper Lantern to our software suite, web hosts can alter the color, feel, and overall experience of the cPanel dashboard to provide their customers with a personally branded and truly unique cPanel experience. So grab a coffee, let’s rebrand, and design cPanel dashboard as if it was your own product.
Preparation
For this process, cPanel Reseller accounts will be the starting point. Any information related to Root accounts can be found in cPanel Style Documentation. Here are a few assumptions of what you’ll need to have:
- cPanel & WHM 11.50 or later
- Reseller account
- Basic knowledge of HTML/CSS/JS
- Basic Command Line
- Design software
Game Plan
Like any project, you’ll need to come up with a game plan. Start by figuring out the areas you wish to customize. Customization can range from colors and layout, to simple behavior interactions. You’re only limited by your imagination!
Once you have an idea of the changes you’d like to make, take the time to draw it out. This will help you achieve your vision without losing sight of your objectives. Think of it as your goal post.
Brand customization
To increase brand awareness, it’s beneficial to provide your customers with a way to identify and associate your brand with the cPanel dashboard. Here is the first course of action necessary to change the cPanel logo to your own custom logo.
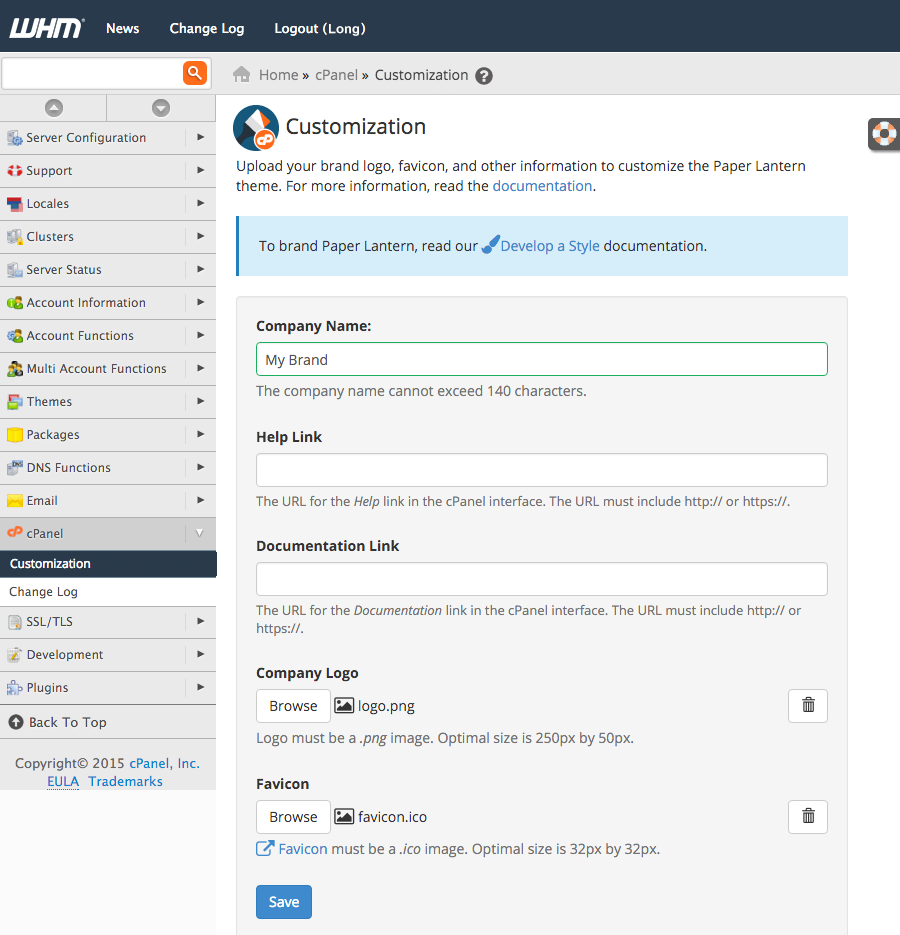
- Log into your WHM dashboard [ex: http://yourdomain.com/whm]
- Navigate to
cPanel > Customization - Type in your company name
- Upload your company logo
- Upload favicon
- Click Save
When you’re finished, switch and log into the cPanel dashboard [ex: http://yourdomain.com/cpanel] and you’ll notice your logo and favicon has been updated.

Theme
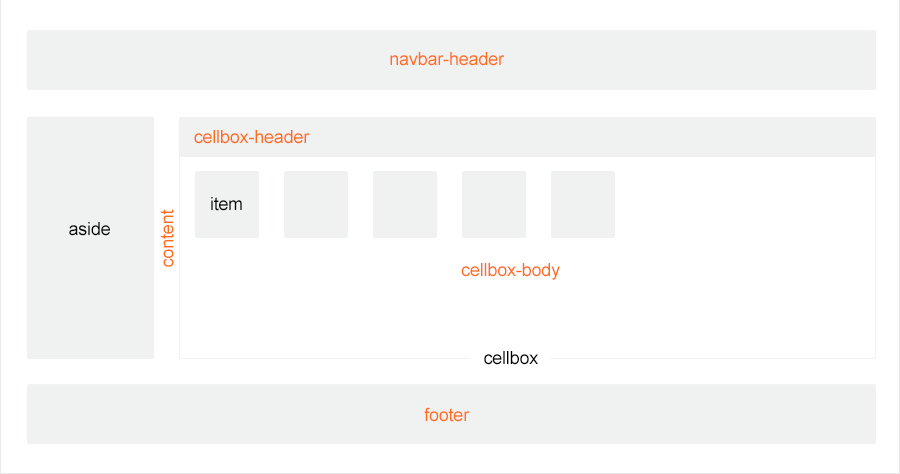
The bulk of customization is done through CSS. The diagram below shows the common elements, in IDs and Classes, that allow you to specify and modify custom style.
Pro Tip:
You can use your mouse and right click on any area in your Chrome or FireFox browser and select inspect element within cPanel dashboard to identify existing IDs and Classes with the style code. Inspecting elements and the steps below will show how each design can be overridden to your own custom style.
- In your cPanel dashboard – navigate to
Home > Filesand select File Manager - In File Manager, navigate to, or create the directory
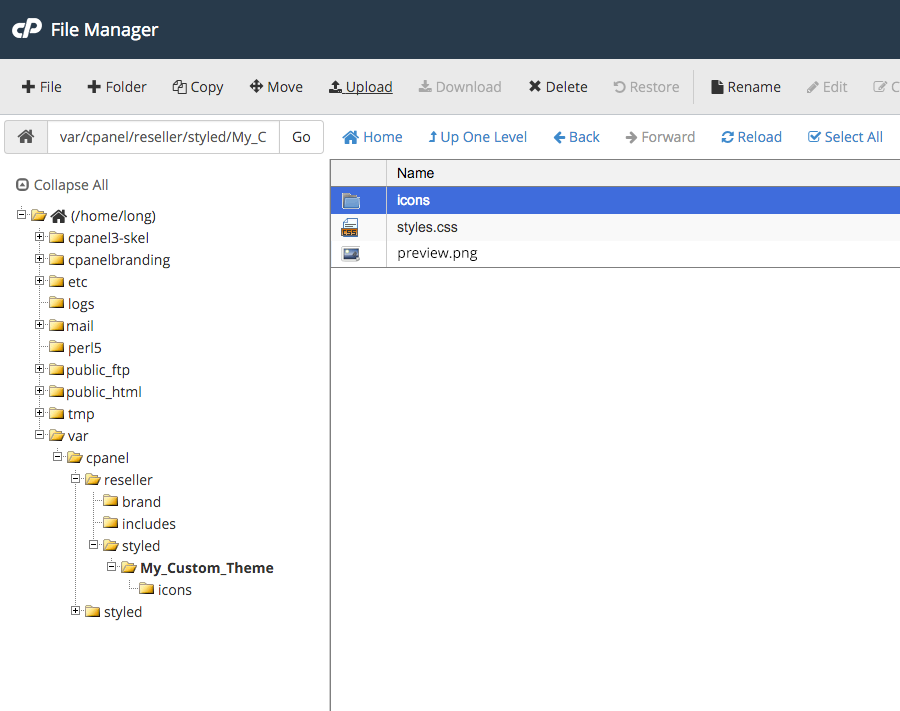
var/cpanel/reseller/styledif it doesn’t exist - Under styled folder – create your own folder name for the theme: ex: My_Custom_Theme
- Within the same directory – create a new file and name it styles.css (must be exactly as it’s spelled and lower caps)
- Right click styles.css and click edit
- In your styles.css type in the following
.navbar-preferences {background-color: blue;} - Save Changes
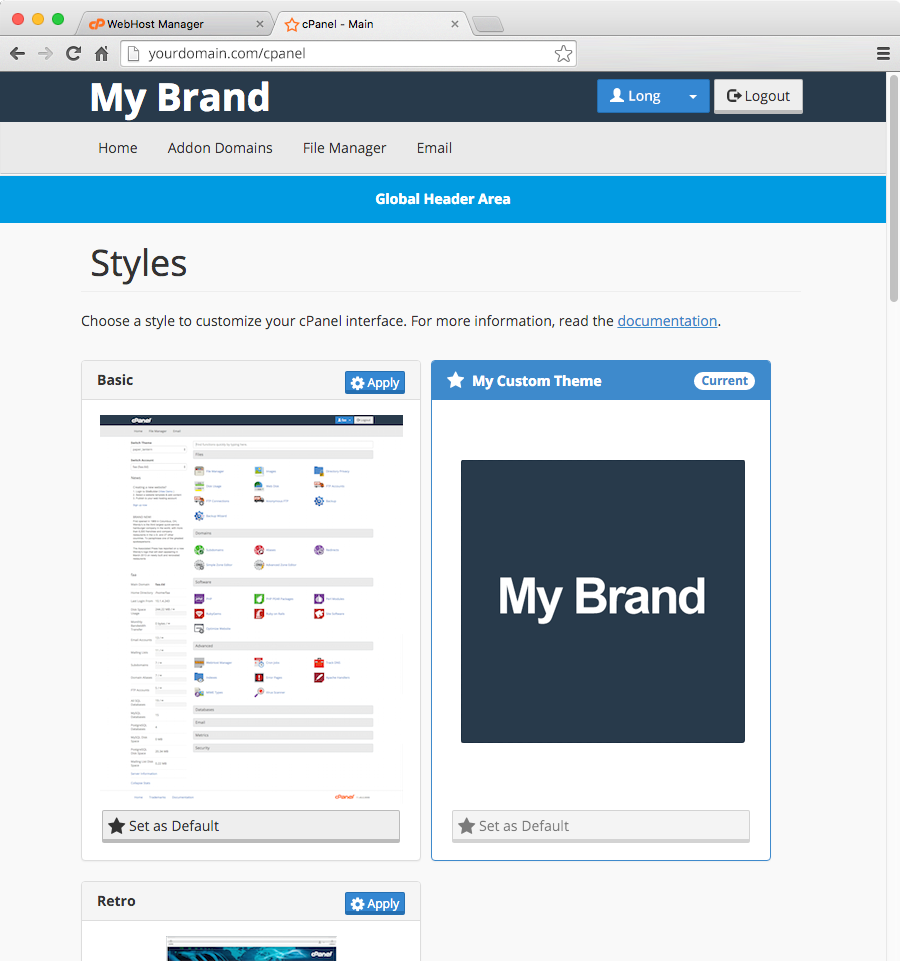
- Change your style to your own custom style (User Preferences > Change Style) and select Apply on My Custom Theme (you’ll notice the background color on the navbar has changed in your cPanel dashboard). This is your theme.
- To include a preview image on the Change Style interface. Screen capture your new interface or design your preview image (500 by 500 pixel and png format), save the file name to preview.png and upload it under My_Custom_Theme directory.
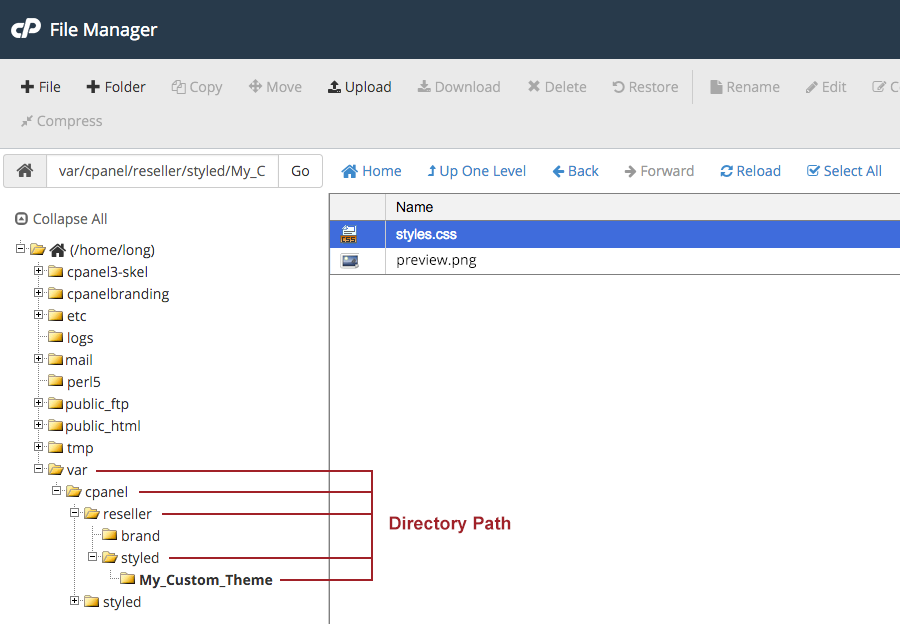
By now your directory path should look similar to the image you see above.
I encourage you to keep tinkering with your CSS style until you’re satisfied. For further information on styling elements, you can read through cPanel documentation on setting up your stylesheet or writing your custom CSS.
Content
Sometimes styling the layout isn’t enough. There might be occasions when additional pieces of information should be included in the dashboard. As of now, there are total of four available areas where you can include your own content. The first two areas are GLOBAL header and footer positions which show up on every page. The GLOBAL positions filename are ”global_header.html.tt” and “global_footer.html.tt”. Then the other two are PAGE TEMPLATES header and footer positions which only show up in the named app. The PAGE TEMPLATES positions filename are “_page_header.html.tt” and “_page_header.html.tt”. With these content additions, you have the options to include plain text, HTML, CSS, and JS to extend your UI enhancement further.
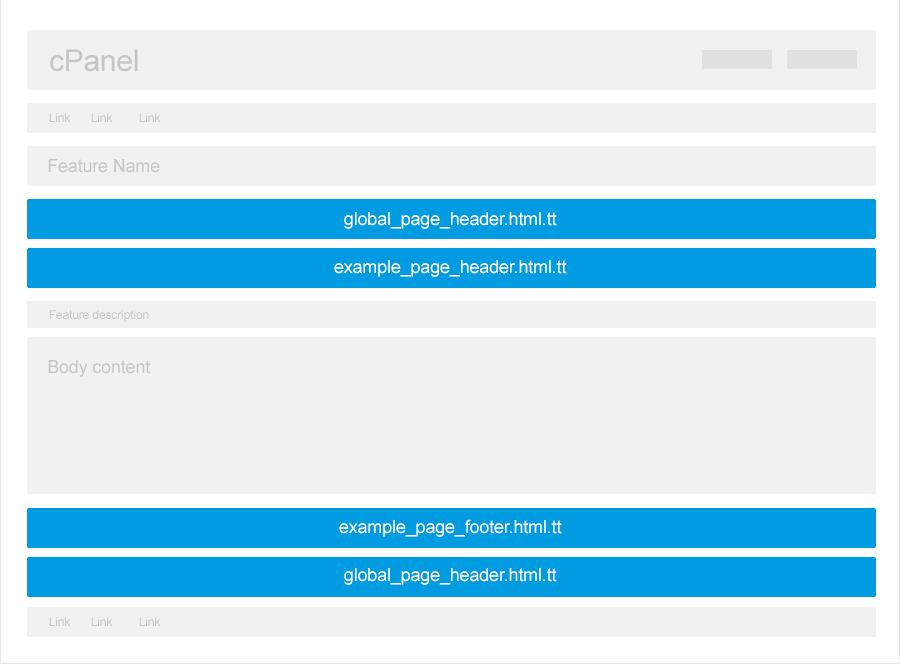
For this example, we’ll add content on both global and page templates using FTP account.
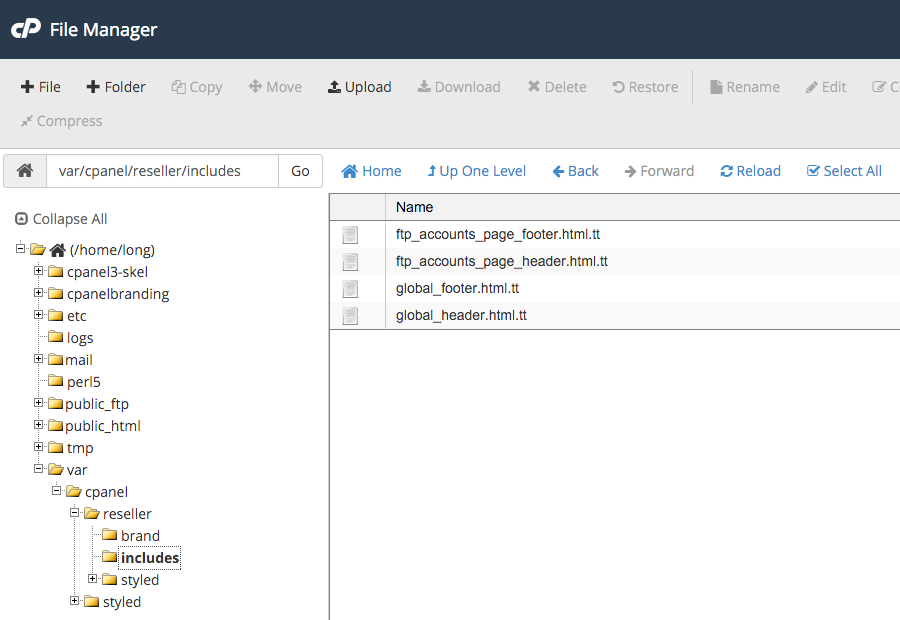
- In your File Manager – create a folder name includes under this directory
var/cpanel/reseller/ - Under the includes folder – Create the following files and name them exactly below:
global_header.html.ttglobal_footer.html.ttftp_page_header.html.ttftp_page_footer.html.tt
To view the filenames on different page templates, visit documentation at Customize Content in Paper Lantern
- Within each file, enter the following code:
- Global Header:
<div style="background-color: #82b74c; color: #fff; font-weight: bold; padding: 15px; text-align: center;">Global Header Area</div> - Global Footer:
<div style="background-color: #82b74c; color: #fff; font-weight: bold; padding: 15px; text-align: center;">Global Footer Area</div> - FTP Header:
<div style="background-color: #82b74c; color: #fff; font-weight: bold; padding: 15px; text-align: center;">FTP Header Area</div> - FTP Footer:
<div style="background-color: #82b74c; color: #fff; font-weight: bold; padding: 15px; text-align: center;">FTP Footer Area</div>
- Global Header:
- Save
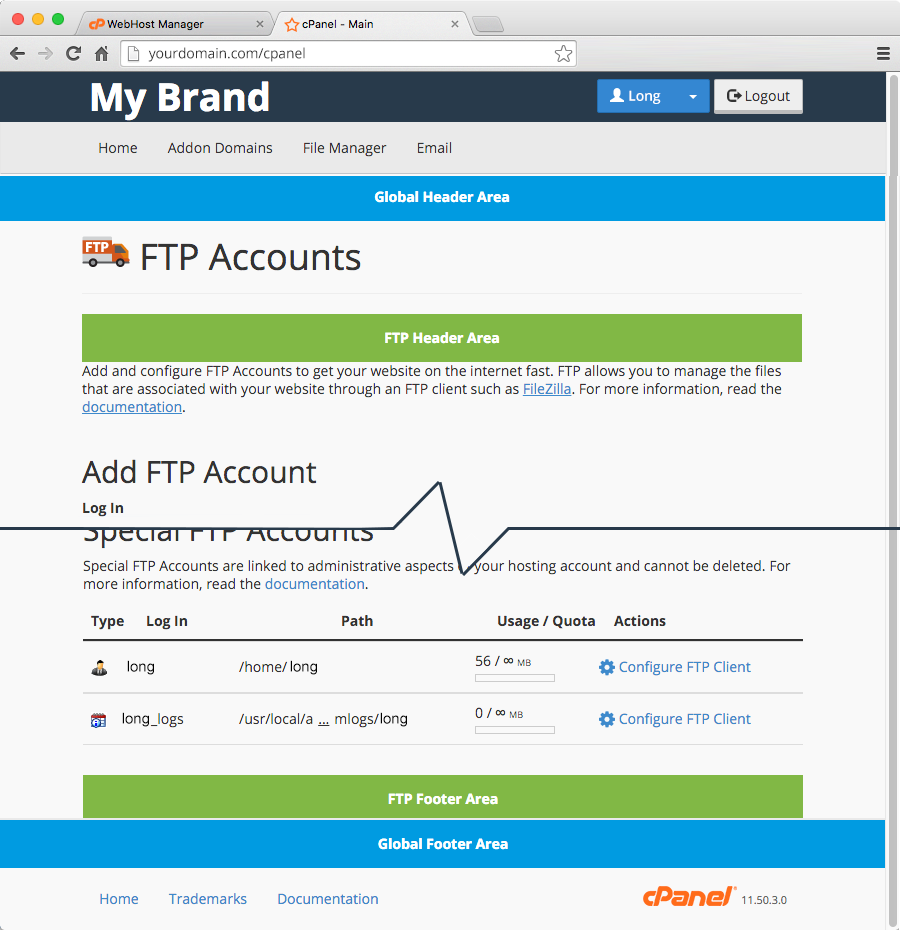
Go to your cPanel dashboard and refresh your browser. You’ll notice all pages have global content and FTP accounts page only include specific content for that page.
Icon
The default cPanel icons are there to help users quickly identify the tools they need, however, they may not complement your custom design or style. Before moving forward, ensure that your custom icons are no bigger than 48x48px, alpha-transparent (no background color), and that they are saved in png format.

-
- Design your custom icons. For this example let’s redesign FTP Accounts icon.
- Visit Paper Lantern’s appkey documentation and find the icon you wish to replace. In this case, the appkey for FTP accounts is ftp_accounts.png so your custom icons should be saved as ftp_accounts.png.
- In your File Manager – navigate to
var/cpanel/reseller/styled/My_Custom_Theme/and create a folder name icons
- Upload your new icons ftp_accounts.png under icons folder
- This is the only place where you’ll need to use terminal (mac) / command prompt (pc). Open up your terminal/command prompt and type the following:
ssh [email protected]password: <enter your password>/usr/local/cpanel/bin/sprite_generator --theme paper_lantern --style My_Custom_Theme
(replace ssh login credential with your username/server name and My_Custom_Theme to your own theme name)
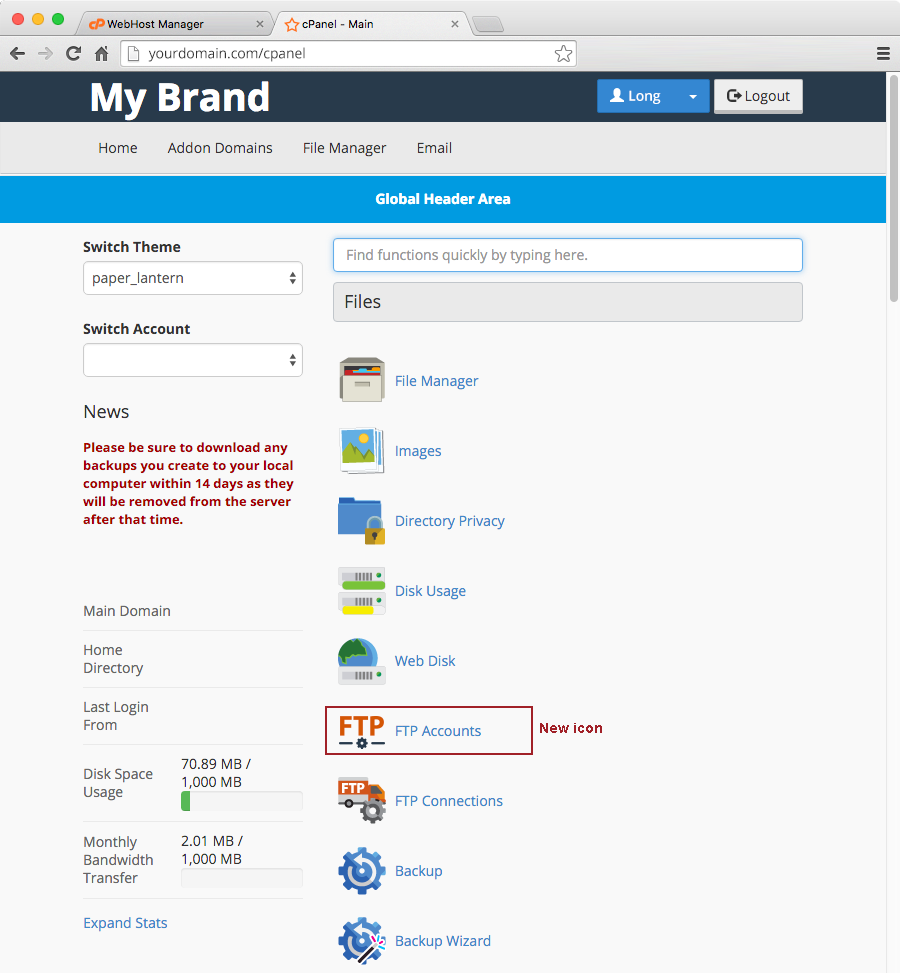
Go to your cPanel dashboard and force-refresh your browser. You should see your new FTP accounts icon.
You can continue to design your own icons and upload it all at once. When done, simply follow the steps above. It will generate the images and override the existing Paper Lantern icons.
Set your style to default
The last step is to set your default style to your own custom design. Simply go to User Preferences > Change Style > Set as Default on one of your custom designs. Once enabled, new and existing hosting account will automatically see your the new custom branded dashboard.
Build it and be known
There you have it folks! You now have the skills and knowledge to rebrand the cPanel dashboard your way. The possibilities are endless. Take control of your brand. There’s nothing but pure joy when it comes to creating your own identity and setting yourself apart from the others.
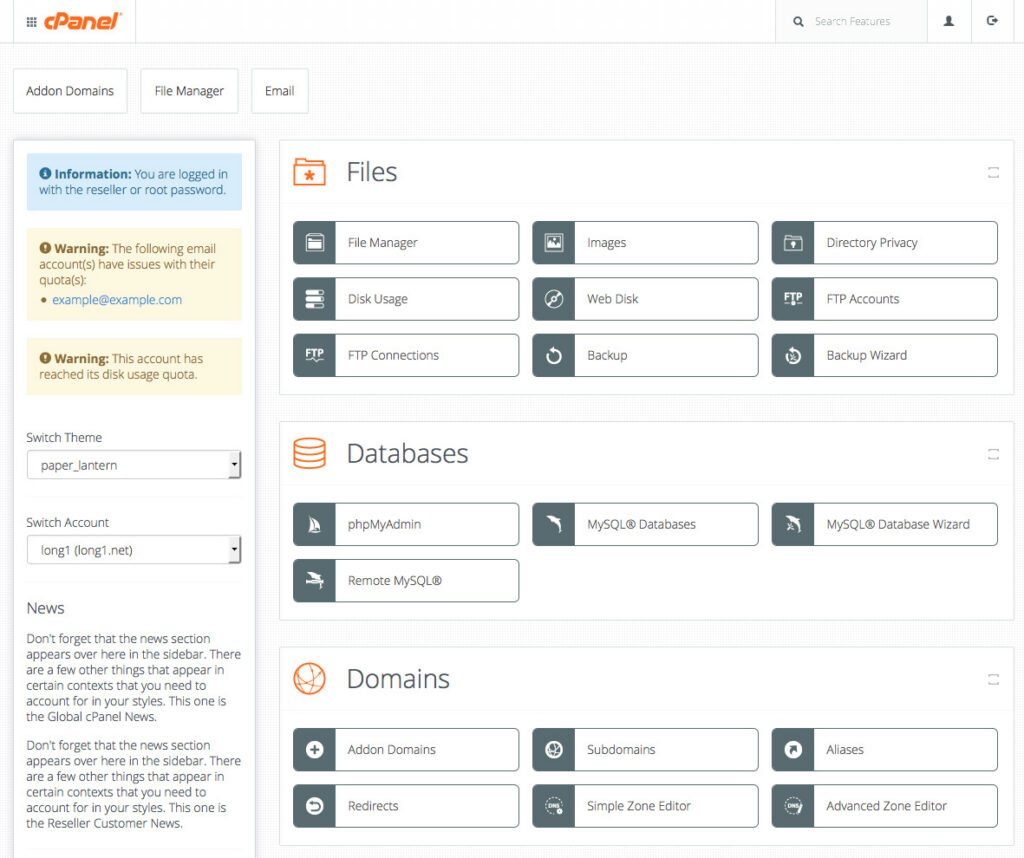
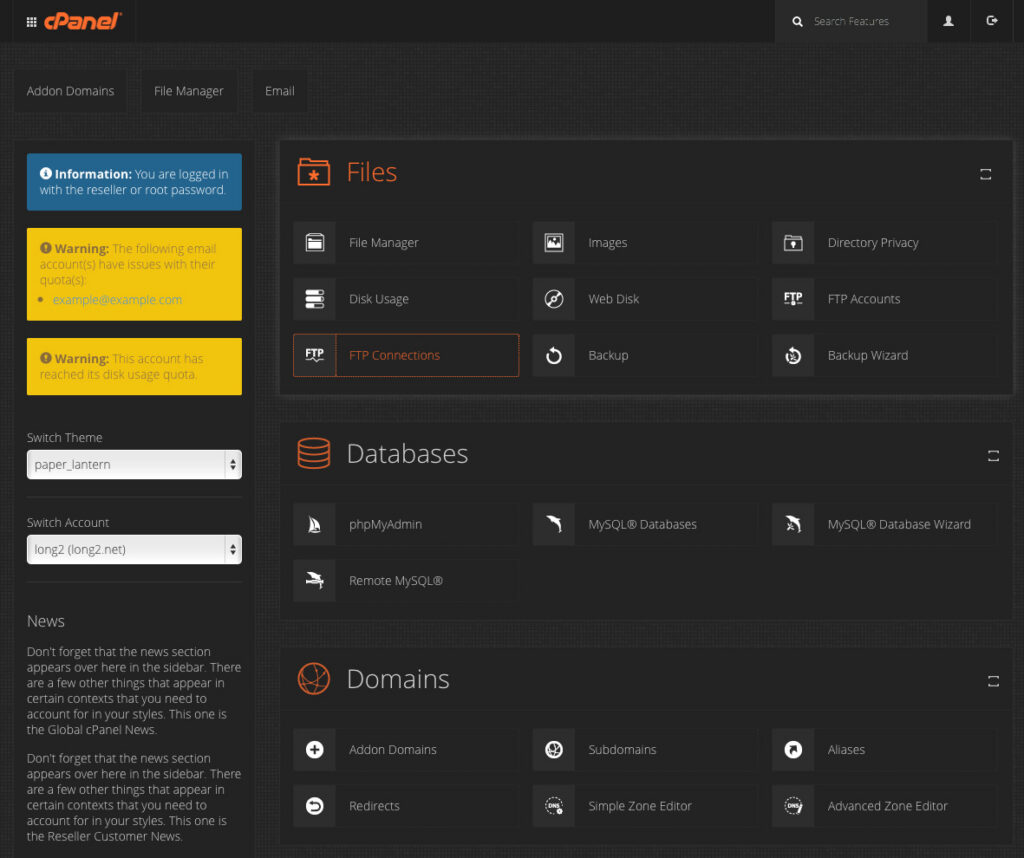
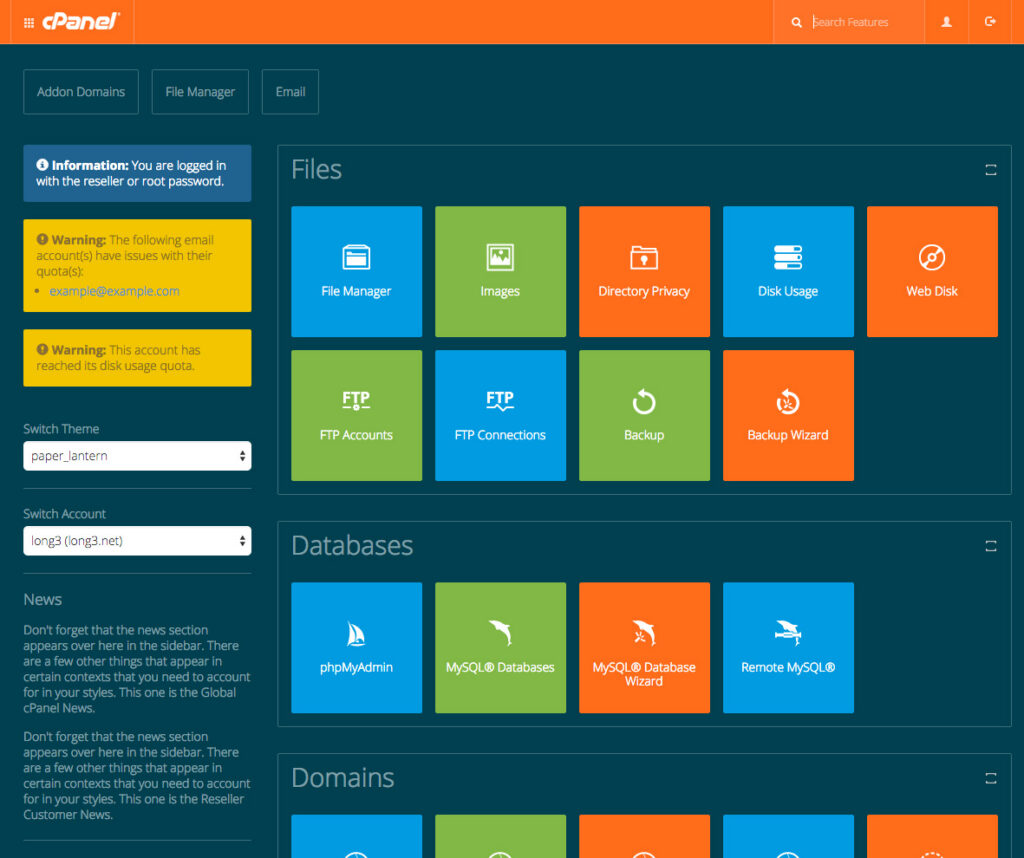
Share your design in the comment section or in our forums. Below are a few examples of what you could do with your new branding skills and cPanel.
Paper Lantern Caveat
When creating your own design style, it inherits all of the functionality and styling of Paper Lantern. This means Paper Lantern is your master template. Because Paper Lantern is constantly evolving and the code is frequently updated, your custom designs could potentially be affected. Visit our release site or subscribe to our mailing list so you can be notified of any changes that may affect your masterpiece.
