In our increasingly busy world, we’d be lost without email, calendar, and contacts apps to communicate, collaborate, and manage our time. Unfortunately, getting all these apps to work with each other can be a frustrating challenge. There are so many incompatible platforms that we often struggle to make our calendar and contact hosting services talk to our preferred devices and applications.
That’s why, in addition to web and email hosting features, cPanel & WHM includes sophisticated calendar and contacts hosting, which users can connect to applications on their computers and mobile devices via the widely supported CalDAV and CardDAV protocols.
In this article, we’re going to show you how to add your cPanel calendars and contacts to apps on iOS®, macOS®, your Android™ devices, other operating systems, and the Roundcube® email client, which is built into cPanel.
Setting Up CalDAV Calendars in cPanel
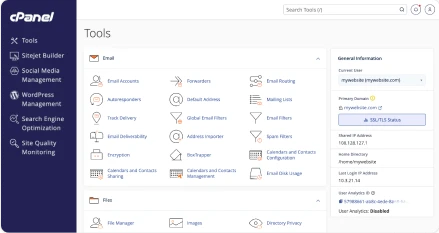
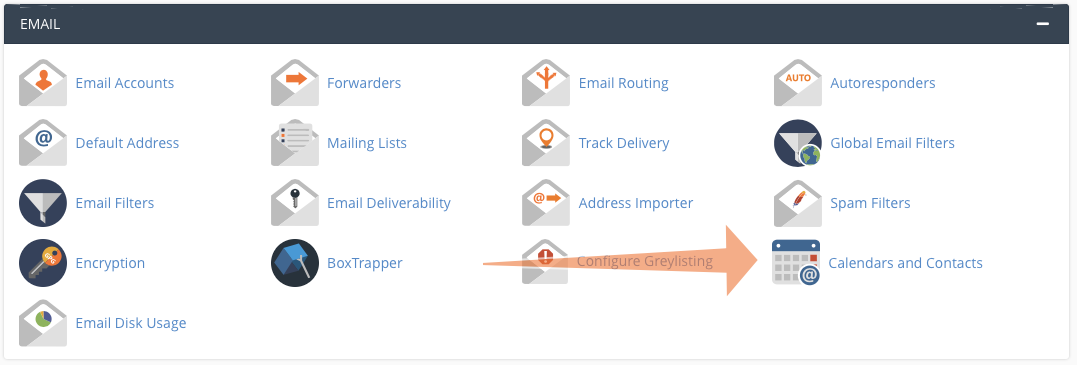
The information you need to share data with your devices is on the Calendars and Contacts page, which you can find in the Email section of the main page.
Here we have provided the following information:
- Username
- Server URL
- Alternate server URL
You will also need to provide a password. When an app or operating system asks for one, enter your cPanel or webmail login password.
Some applications have limited support for retrieving CalDAV and CardDAV account information from the server. In that case, you need a direct URL, which is displayed at the bottom of the Calendars and Contacts page.

How to Set Up Calendar Delegation in cPanel
You may sometimes need to let another user view or manage your calendars. For example, you might want a manager or assistant to add and edit events. In cPanel, this is called “delegation,” and you can configure delegates on the Calendar Delegation page.
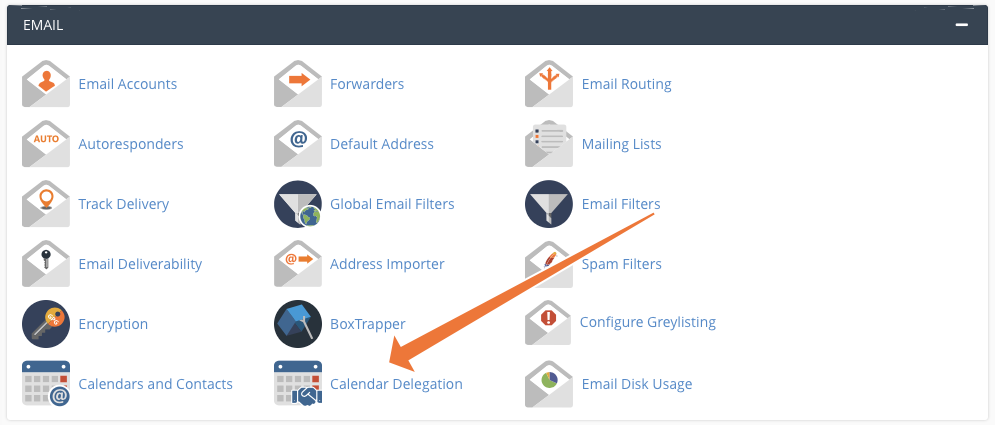
Select a calendar owner and delegate in the dropdown menus. Check the Allow Editing box if you want to give the user editing privileges. You can only delegate to people with an email account on the server, so you need at least two accounts for this to work.
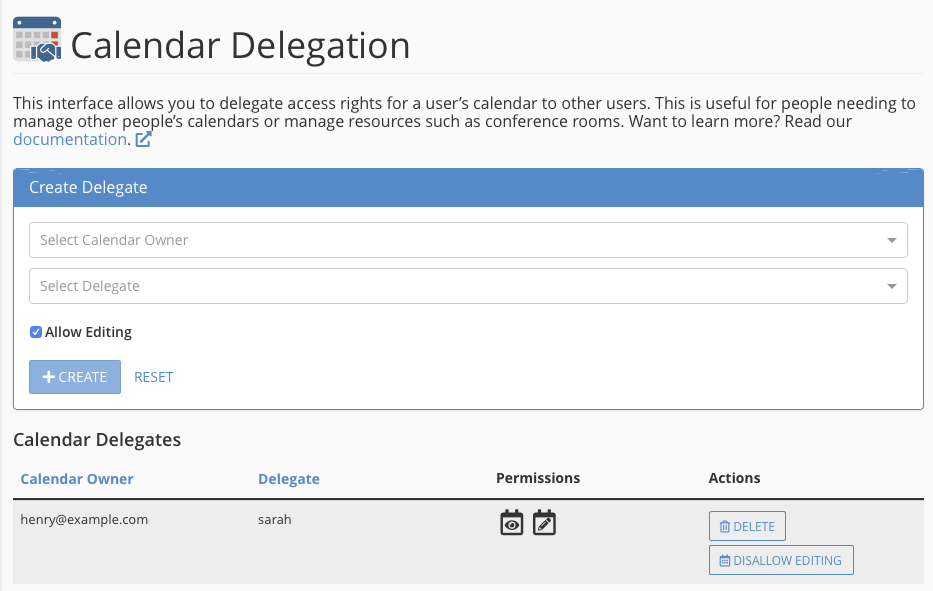
Delegation is only available if your hosting provider has installed the Calendar and Contacts Server plugin in WHM. If the plugin is not installed, you won’t see the delegation menu item.
Connecting cPanel Calendar and Contacts to iOS and iPadOS®
iOS and iPadOS have excellent CalDAV and CardDAV account support, and it is straightforward to integrate your contacts and calendars with the platform’s native apps.
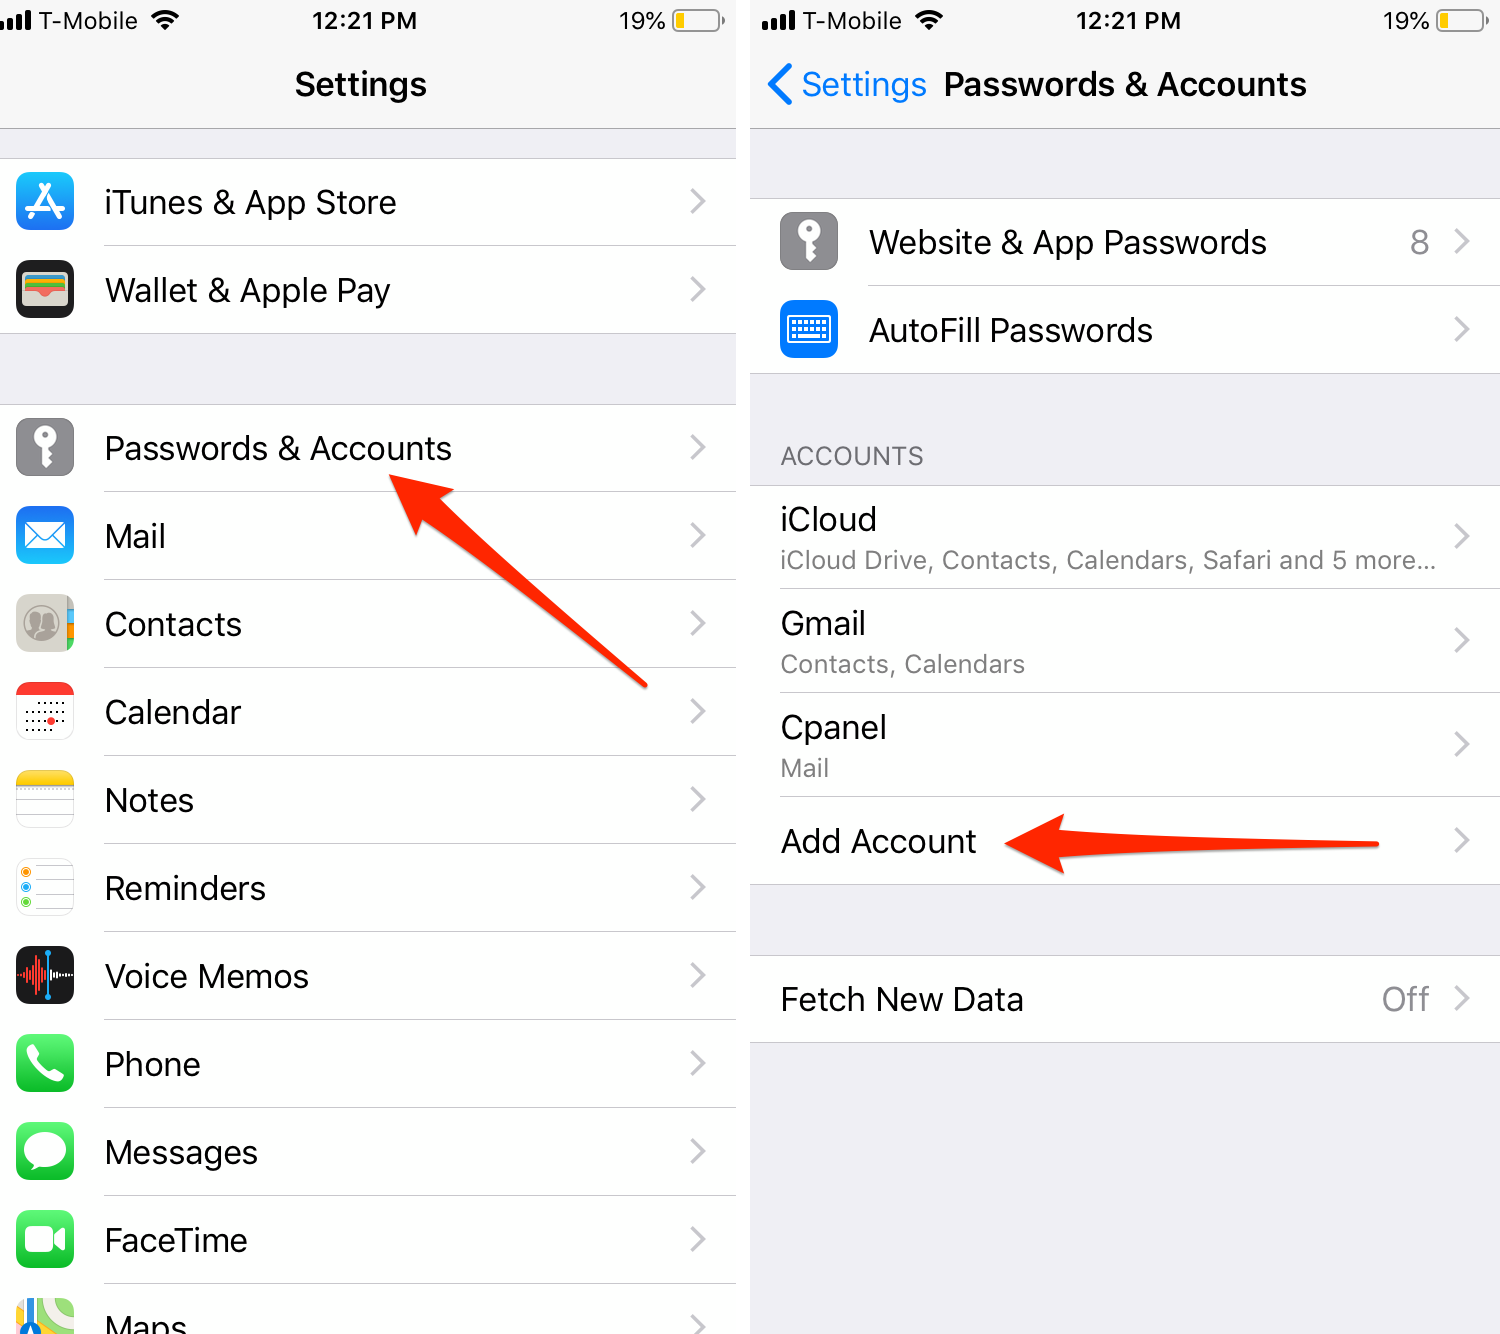
First, open the Settings app on your iPhone or iPad. Select Passwords & Accounts, and then Add Account.
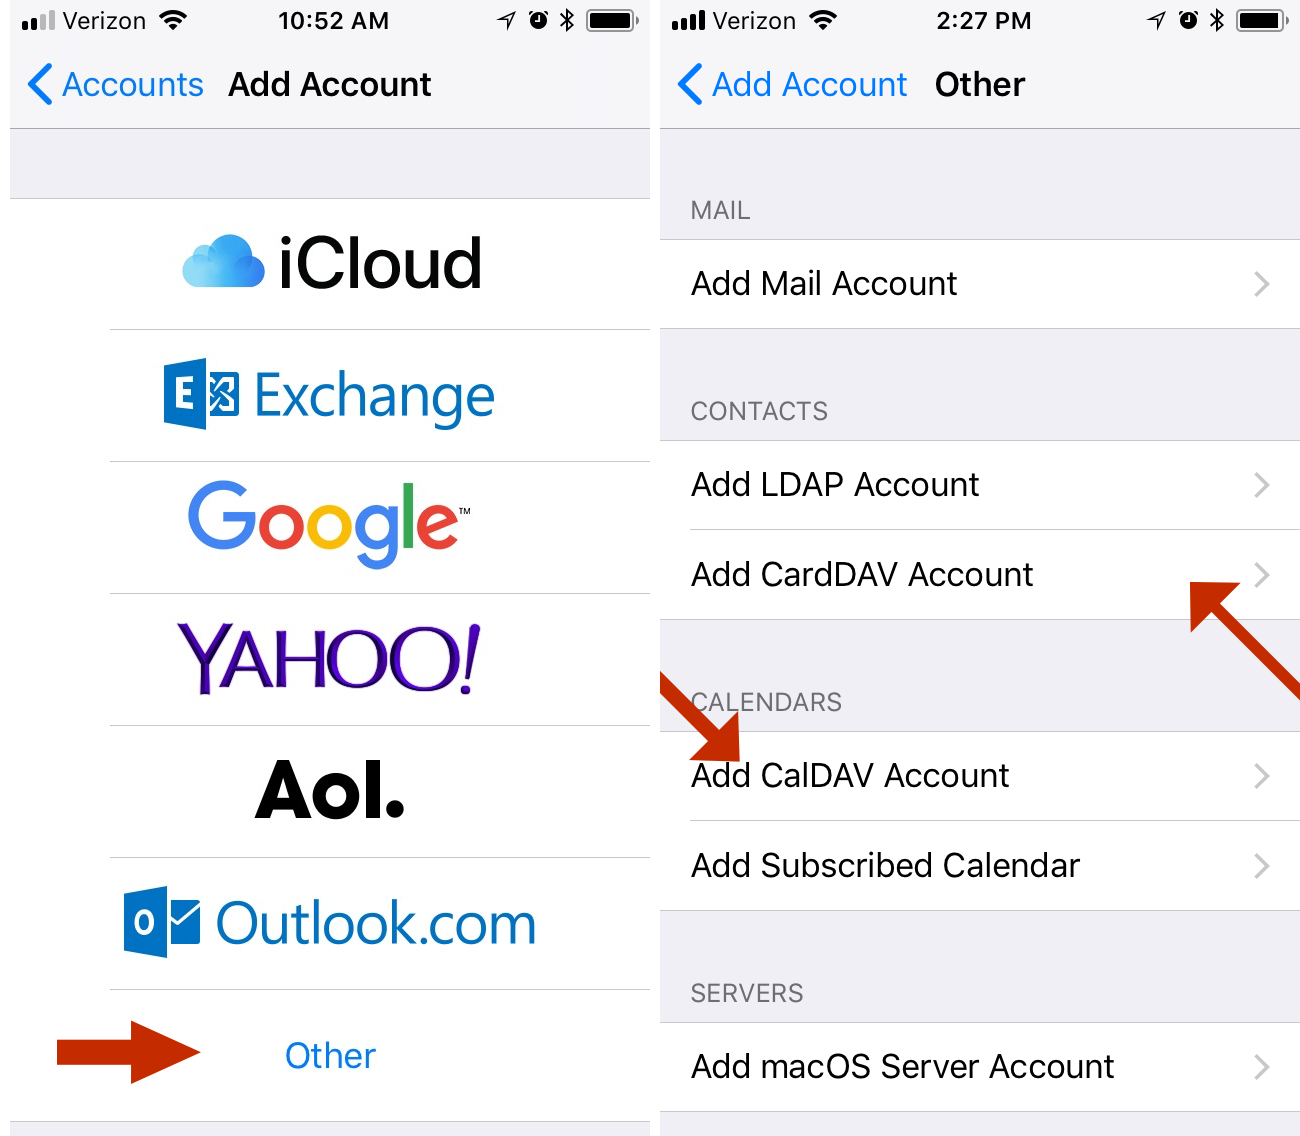
Choose Other at the bottom of the page, and then Add CardDAV Account for contacts or Add CalDAV Account for calendars.
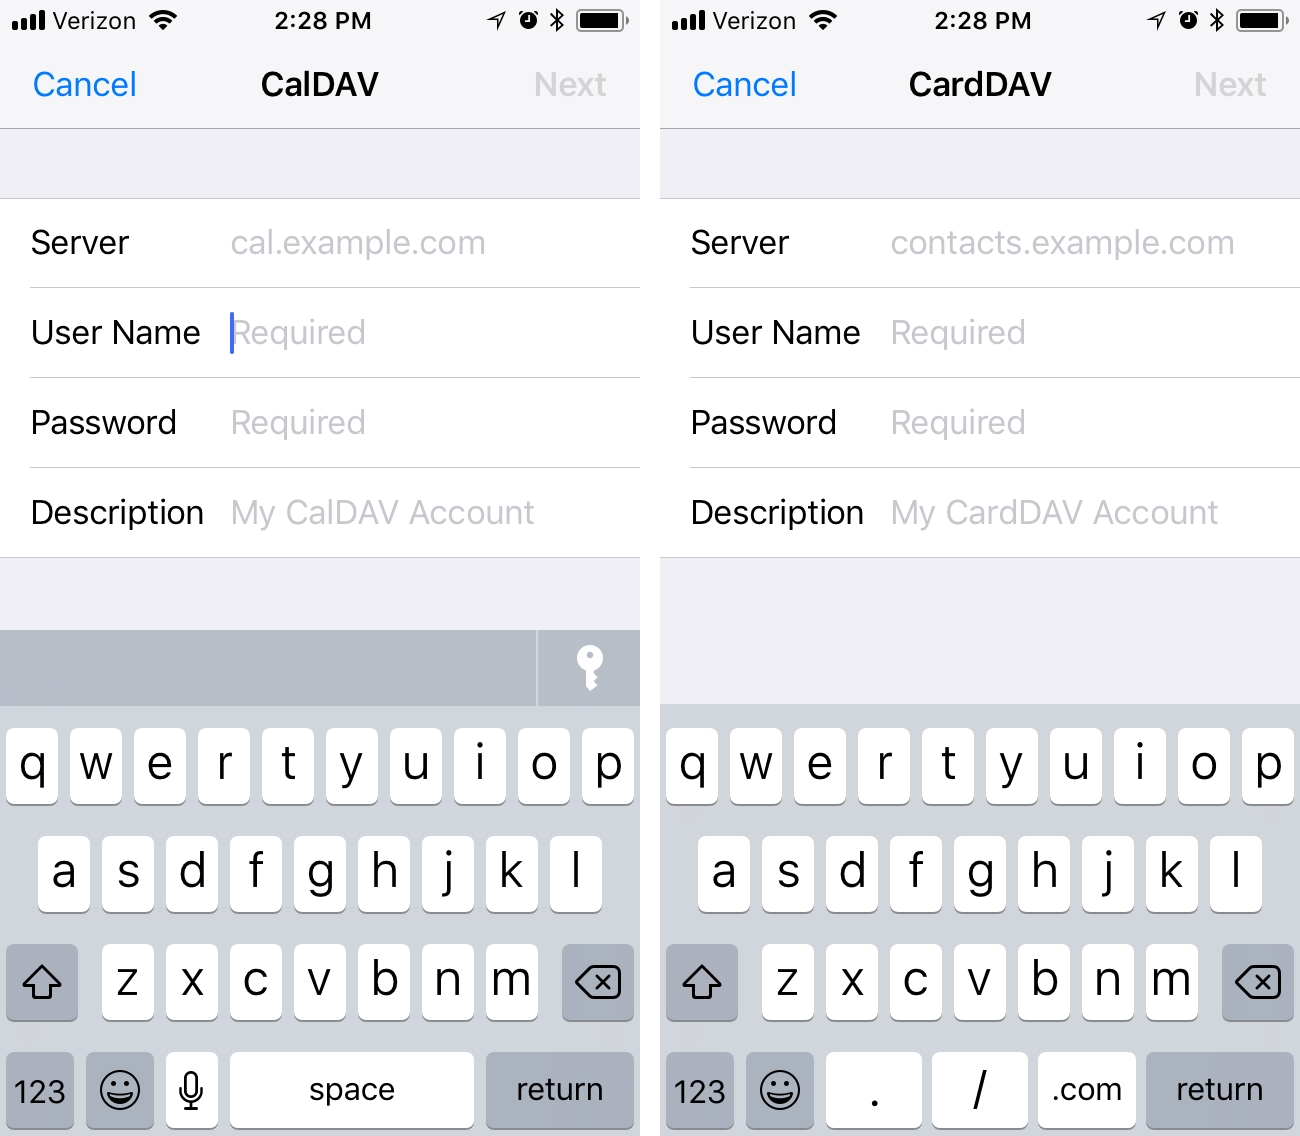
Finally, enter the server and authentication details, as we discussed above. cPanel uses port 2080 for CalDAV and CardDAV, so be sure the URL ends in a port number, like so:
example.com:2080
Connecting cPanel Calendar and Contacts to MacOS
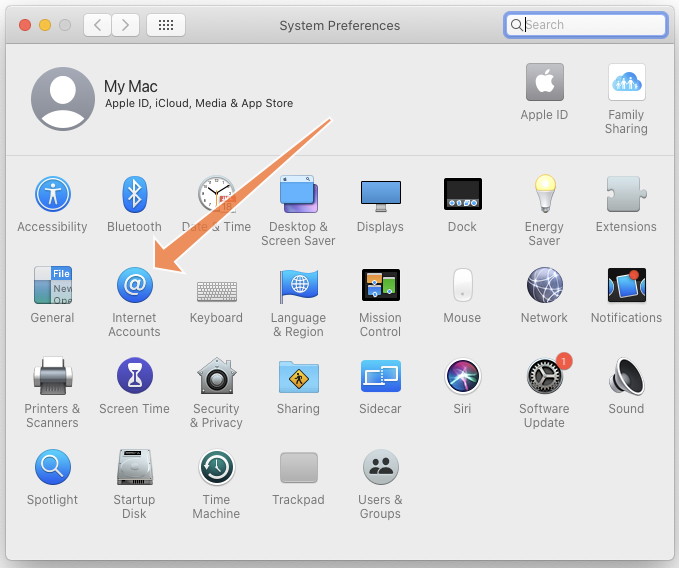
It is similarly straightforward to synchronize with a Mac. Open the System Preferences app, which you will find in the Apple menu on the menu bar. Then, select the Internet Accounts icon.
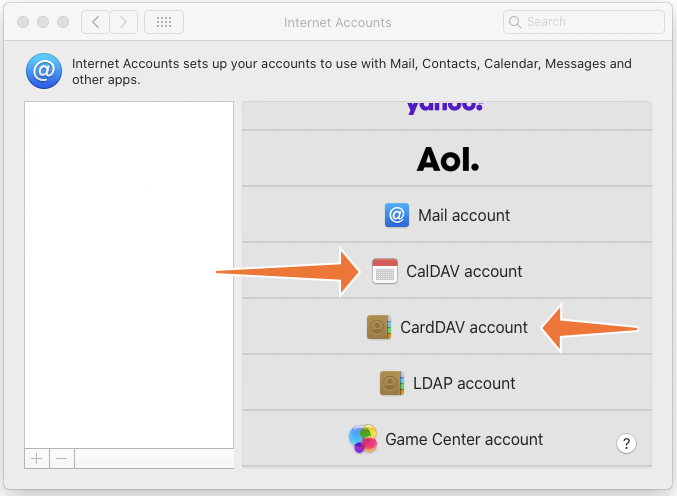
Click Add Other Account at the bottom of the menu and then Add CardDAV or Add CalDAV.
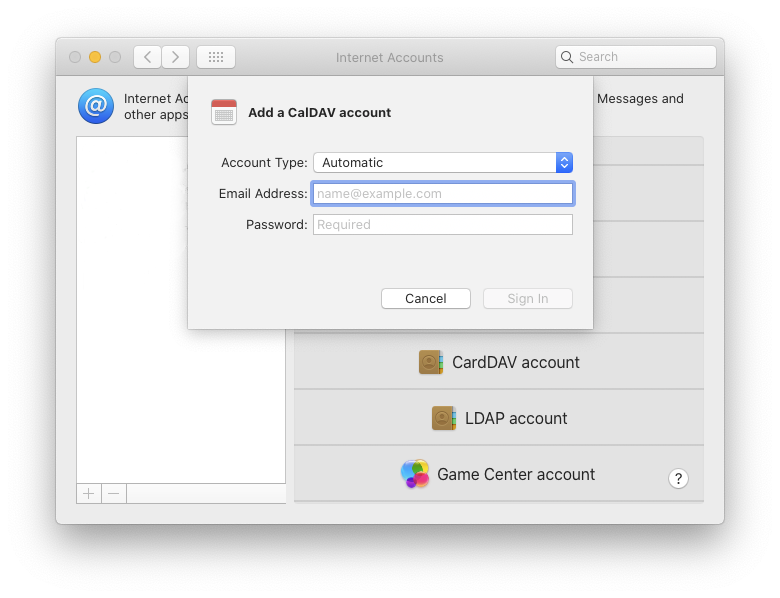
Ensure that the Account Type is set to “automatic” and enter your email address and password in the appropriate fields. Click sign-in and macOS will connect to the server.
Connecting cPanel Calendar and Contacts to Android and Other Operating Systems
There are many operating systems and hundreds of apps out there with varying levels of CalDAV and CardDAV support. We can’t test them all, but most should work if you give them the correct server and authentication details.
You might need to experiment with your app or OS, but the following should help you out.
- Username: This will be your account username or your webmail user in the format: username or [email protected].
- Server: The URL of your server. If the app supports autodiscovery, the server’s URL is sufficient. If it does not, you will need to provide a direct URL.
- Password: This is your cPanel or webmail account password.
If the app isn’t playing ball, you may be able to find app-specific instructions on Google or on the official cPanel forum.
Setting Up cPanel Calendar and Contacts with Roundcube 1.4 Desktop
cPanel integrates the open-source Roundcube webmail client, which provides an excellent user experience for email and calendar management. Roundcube supports CalDAV, and you can connect it in the same way as other applications.
Roundcube uses the direct URLs available at the bottom of the Calendars and Contacts page. Before you begin, identify the calendar you want to add to Roundcube and copy its direct URL.

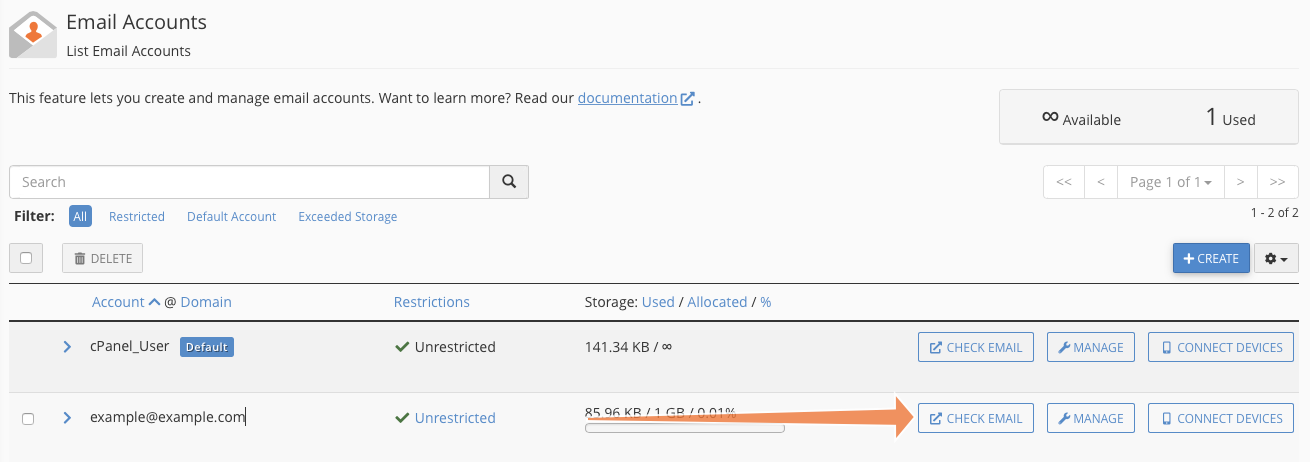
To add a calendar to Roundcube, first open Email Accounts.

Select Check Email to open the Webmail interface.
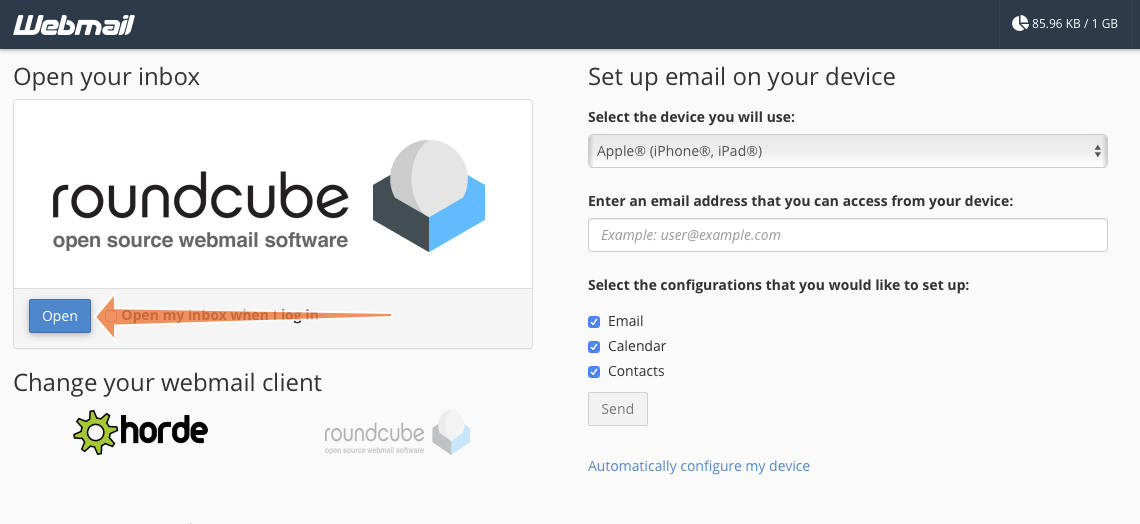
Click Open to open Roundcube in a new tab.
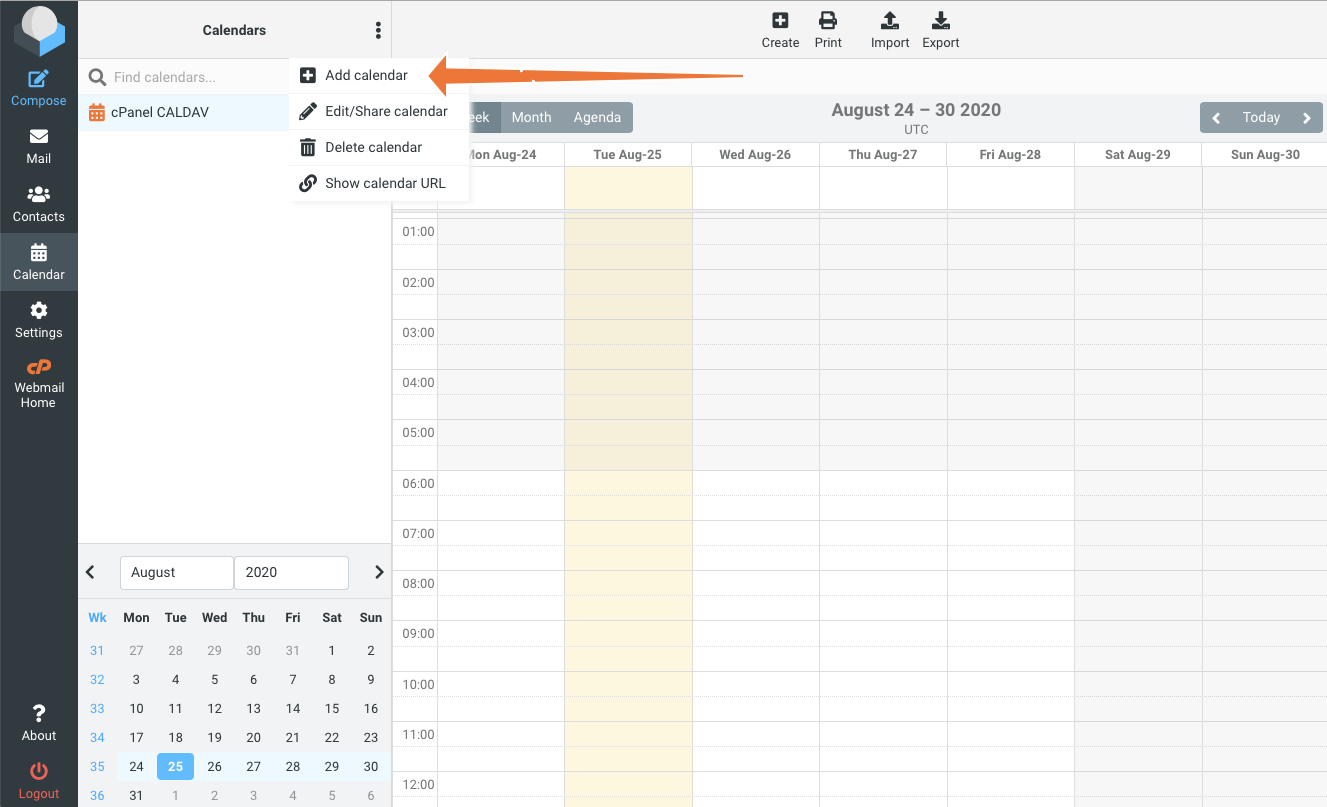
In Roundcube, select the Calendar tab on the left, and then Add Calendar from the overflow (⋮) menu.
Fill in the Name field with a name that is meaningful to you and paste the direct URL you copied earlier into the CalDAV URL field. In the Authentication section, add your webmail account username and password.
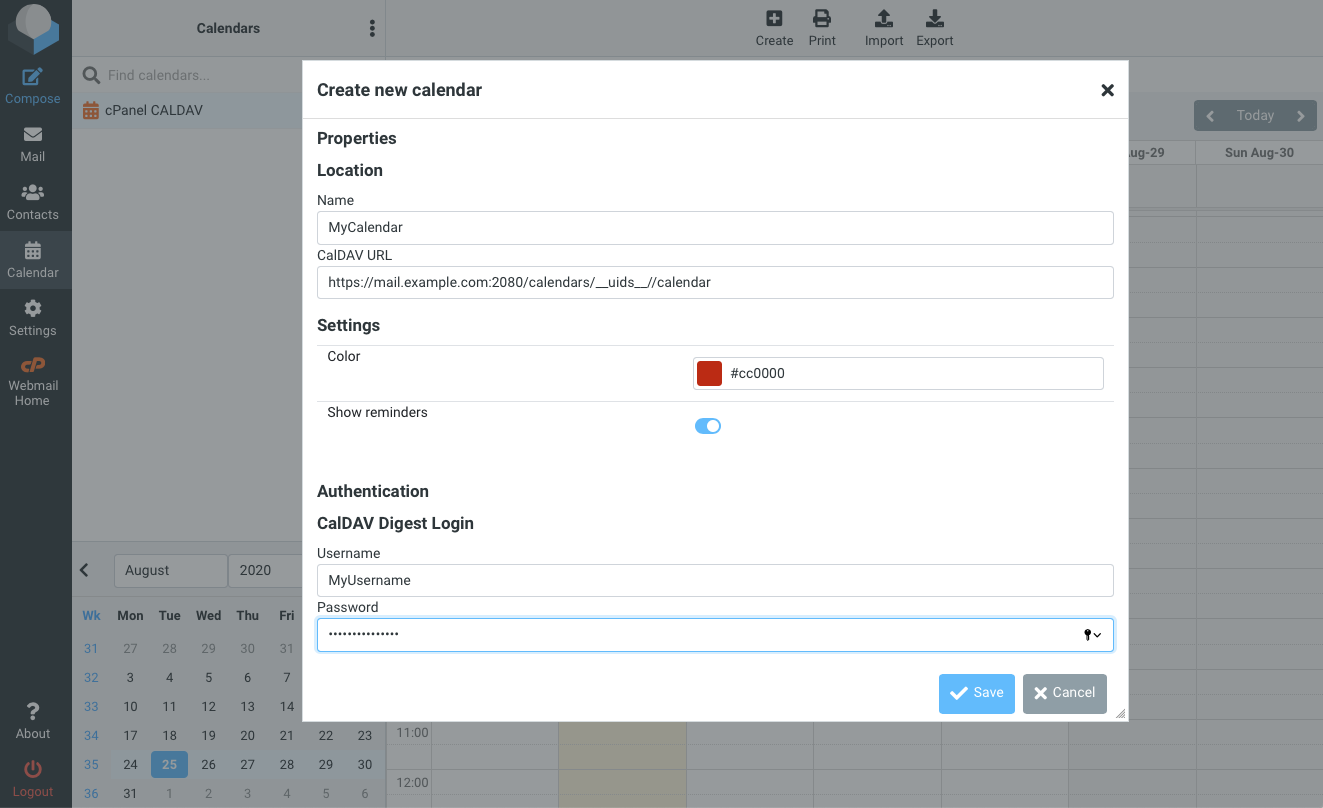
Click Save and the new calendar will be added to Roundcube and synchronized.
cPanel & WHM includes robust and sophisticated mail, contact, and calendar hosting that clients can access from any device that supports the ubiquitous IMAP, CalDAV, and CardDAV protocols. Because cPanel also integrates a powerful and intuitive email and calendar client with Roundcube, hosting businesses benefit from the ability to offer a complete business communications solution competitive with popular cloud email services.
As always, if you have any feedback or comments, please let us know. We are here to help in the best ways we can. You’ll find us on Discord, the cPanel forums, and Reddit.
